Remodeling a kitchen is a big – and expensive – project. According to HomeAdvisor, the average kitchen remodel costs $22,185, and a full-scale remodel with custom cabinets, granite counters, and high-end appliances can come to $30,000 or more.
If you’re a homeowner with big kitchen dreams and a small budget, your heart is probably sinking as you read these numbers. But don’t give up hope yet! There are a lot of ways to stretch your kitchen remodeling budget. With the right combination of patience, creativity, and elbow grease, you can make a big impact in your kitchen for a few thousand bucks – or even a few hundred.
Better still, a kitchen remodel done on a budget can add value to your home. According to HGTV, most homeowners get back 90% to 100% of what they spend on a kitchen remodel when they sell the house. That means if you do that same project for half the cost, you can actually double your investment. Savings today plus returns tomorrow – that’s a win-win.
General Tips
Many of the same tips that work for decorating on a budget also apply to remodeling. In addition, there are other strategies that can work for any kind of remodeling project, not just kitchens. These general savings tips fall into three main categories: planning, materials, and labor.
Plan Your Project
The first, most important rule for saving on a kitchen remodel is to take your time. Give yourself a few weeks – or even a few months, if you’re planning a major renovation – to get a clear idea of exactly what you want. Look at lots of different design ideas, price out various options, and get advice from contractors and other pros. Having a clear plan will help you avoid mid-project design changes, which can really jack up the overall cost.
As you plan, think about your priorities. It’s tempting at the start of a project to say, “While we’re at it, we might as well…” and tack on a whole wish list of other jobs to do at the same time. Before you know it, the scope of the project has ballooned to twice its size – along with the budget.
Instead, step back and look at your kitchen with a critical eye. Ask yourself what bothers you most about it, what you actually like, and what you don’t love but can live with. For instance, maybe you need new cabinets, but your existing counters and flooring are okay as is. The more of your old kitchen you can leave untouched, the less you’ll spend on the remodel.
This is especially true when it comes to the kitchen layout. Relocating your kitchen sink requires re-plumbing all the pipes that lead to it, and moving a range involves shifting gas or electric lines. Consumer Reports says either of these jobs will require at least a day’s worth of work from a plumber, an electrician, or both – at $45 to $145 per hour.
Even if you have to move things around, think twice before you add a lot of extra space to the kitchen. Big kitchens don’t just cost more to build; they can also be tiring to work in. According to Architectural Digest, each side of your kitchen “work triangle” – the space between the stove, fridge, and sink – be between 4 and 9 feet, and the three sides together shouldn’t add up to more than 26 feet.
Save on Materials
The best way to save on materials is to keep what you have whenever possible. Often, a fresh coat of paint is enough to give dingy old walls, cabinets, or even counters a whole new look. You can also look to other rooms in your house for pieces you can reuse. Maybe that old bench you’re so tired of in your front entry would be just the thing for your new breakfast nook.
Here are a few other ways to save on materials for your new kitchen:
- Shop Around. If you find something you really like – say, some gorgeous floor tile or a perfect lighting fixture – it’s tempting to grab it and check it off your list, whatever the cost. But it’s worth taking extra time to see if you can find what you want for less. Maybe another tile store has that same fabulous tile on sale for half price, or maybe there’s a cheaper lighting fixture that’s even more perfect. Patience and persistence are the keys to finding what you want at the right price.
- Shop Secondhand. Reuse centers, such as the Habitat for Humanity ReStore, carry all kinds of materials you can use in a kitchen remodel. You can find tile, counters, cabinets, hardware, lighting fixtures, sinks, and appliances, all at bargain prices. Other good sources of secondhand materials include sellers on Craigslist and eBay and even freebies from your local Freecycle group. Of course, you have to check these secondhand finds carefully to make sure they’re in good condition, but if you’re lucky, you can fill many of your renovation needs at a fraction of the retail price.
- Sell Your Old Stuff. The same stores and websites that offer bargains on secondhand materials can also help you sell your own. Often, the stuff you tear out when you redo a kitchen – stuff like counters, appliances, and lighting fixtures – is still perfectly usable. Rather than just dumping it in a landfill, see if you can find a buyer for it. That old bright-yellow stove you always hated could be perfect for someone doing a vintage kitchen remodel, and the money you get for it can help offset the cost of your new stainless-steel range.
- Mix It Up. These days, it’s trendy for kitchens to use a combination of different finishes. For instance, you can have different colors on your upper and lower cabinets, or use different materials for your kitchen island and the rest of the counters. This means if there’s a high-end material you love, you can use just a little touch of it as an accent and go cheaper elsewhere. For example, you can use fancy glass doors on your upper cabinets and go with a more basic design for the lower ones.
- Focus on Details. If your kitchen is functional, but boring, a few small and inexpensive changes could be enough to brighten it up. Little details like faucets, lighting fixtures, and cabinet hardware can change the whole look of a room without a lot of effort or expense. Accessories, such as green plants, artwork, and decorative pottery, can also make a surprisingly big impact on a small budget.

Save on Labor
According to HomeAdvisor, about one dollar out of every four spent remodeling a kitchen is for labor – plumbers, electricians, carpenters, and so forth. The more of that work you can do yourself, the more money you can shave from your budget. So, it makes sense to DIY (do it yourself) whenever you can.
However, when you’re remodeling on a big scale, trying to do everything yourself is probably a mistake. Tackling a job that’s beyond your abilities won’t save you money if you end up having to hire a pro to fix your mistakes – or if you end up with hospital bills after an accident with an unfamiliar power tool.
When deciding whether to DIY or hire a contractor, research the job carefully to get a clear idea of what it involves. Be honest with yourself about your DIY skills, and decide whether it’s something you can handle on your own. If it’s a job you’ve done before, or one where a few rookie mistakes won’t do much damage, go ahead and tackle it. If not, leave it to the pros.
One part of the job you can probably do on your own is demolition. Tearing out cabinets and flooring is a lot easier than putting new ones in, and you don’t need a contractor’s license to swing a sledgehammer. Doing the demo work yourself turns the kitchen into a blank slate, so your contractors can come in and get straight to work on the more complicated jobs.
For the jobs that require professional help, the best way to save is to find a good contractor who will do the job right for a fair price. Take the time to get multiple quotes on each job – plumbing, wiring, and so on – and make sure you get all the details about what is included in the price. The lowest bid isn’t a bargain if all it gets you is a half-baked job. Call the contractors’ references, and, if possible, look at some of their recent work in person to assess their skills.
When you decide on a contractor, get a written contract with all the details spelled out. It should list every phase of the project and every product that’s included. Also, make sure contractors provide copies of their licenses, workers’ compensation, and liability insurance, so you know they’re still valid.
Save on Specific Items
Most kitchen remodels focus on changing the biggest items in your kitchen – cabinets, counters, appliances, and flooring. However, you can also make a big impact with smaller changes, such as adding a new backsplash or changing the lighting. Fortunately, there are plenty of ways to save on all these updates, both big and small.
Cabinets

Cabinets are one of the biggest costs for a kitchen remodel. According to Consumer Reports, new cabinets can eat up as much as 40% of your total kitchen budget. That works out to over $8,600 for the average kitchen remodel.
Fortunately, there are lots of ways to keep this cost down. Here are a few ideas:
- Change the Finish. If your old cabinets are in good shape, but they just don’t look good, you can save a bundle by repainting or refinishing them. First, take off all the doors, clean both doors and cabinet faces with a degreasing agent, and rinse. Then, if you’re repainting, give the cabinets a light sanding and apply primer and a coat or two of paint. To refinish, sand the cabinets more thoroughly to remove all the old finish, then apply fresh stain and varnish. This can give you a complete set of new-looking cabinets for a few hundred bucks. Be careful, though; if your cabinets were installed before 1978, their current paint or finish may contain lead. In that case, refinishing is a job best left to a pro, which will cost you about $50 per door.
- Reface the Cabinets. Another way to update old cabinets is to get them refaced. This involves replacing all the doors and drawer fronts and applying new veneers to the cabinet boxes. It’s costlier than repainting – around $150 per cabinet door opening – but it gives you more options for changing the look of the cabinets.
- Replace the Hardware. While you’re freshening up the cabinets, get them some new hardware. Swapping out old handles and drawer pulls for new ones is an easy DIY job that can give your cabinets a dramatically different look. New knobs and pulls can cost anywhere from $2 to $20 apiece, according to HouseLogic. That means for an average kitchen with 30 linear feet of cabinets, you can expect to pay between $80 and $800. Even if you go for the high-end hardware, that’s still a fraction of the cost of new cabinets.
- Choose Stock Cabinets. New cabinets vary widely in price – and in quality. Custom cabinets, which are built to fit your kitchen, start at around $500 per linear foot – $15,000 for a typical kitchen. By contrast, budget-priced stock cabinets, which come in a limited range of styles and sizes, can cost as little as $70 per linear foot. Stock cabinets vary in quality; they’re often made of particle board with a veneer on top, rather than sturdier plywood. However, Consumer Reports says it’s possible to find budget models that hold up just as well to wear as the high-end brands. The bottom line is, don’t skimp on cabinet quality, but don’t assume you have to pay top dollar to get it.
- Use Open Shelving. A popular look for modern kitchens is to ditch the upper cabinets altogether and replace them with open shelving. This gives your kitchen a more open, airy look, which can be a big plus if the room is small or dark. It also allows you to show off pretty dishes. Also, open shelves are cheap, so it cuts your cabinet budget nearly in half. The downside is that when your items are always on display, you have to spend more time keeping them clean and organized.
- Install Them Yourself. Most of the cost of new cabinets goes toward materials, but the labor costs aren’t cheap either. According to Improvenet, homeowners typically spend around $2,100 to have their old cabinets removed and new ones installed. If you’re reasonably handy, you can save this cost by installing the cabinets yourself. However, this is a big project that takes a lot of time. According to Consumer Reports, you should expect to spend at least an hour assembling and putting up each set of base and wall cabinets. Lower cabinets are easier to do than uppers, so installing your own can be a good option if you’re planning to replace the upper cabinets with open shelving.

According to HomeAdvisor, having new countertops installed typically costs around $3,100 for a mid-range kitchen remodel. However, the price can vary widely depending on what material you choose. Common countertop materials include:
- Laminate. This common material is made from a core of particle board or compressed paper, covered in a thin layer of hard plastic. It’s easy to install, and it comes in a wide variety of colors and patterns. On the downside, it scratches easily if you cut on it. Common brands include Formica and Wilsonart. Cost: $5 to $25 per square foot.
- Solid Surface. Solid-surface counters, such as Corian, are made from acrylic, polyester, or a blend of the two. This surface is stain-resistant and available in a wide range of colors. It scratches easily, but small nicks and scratches can be sanded out. Cost: $15 to $50 per square foot.
- Butcher Block. A butcher-block counter is made from thin strips of wood bonded together into a slab. It’s easy to install and has a warm look that many homeowners like, but it’s vulnerable to stains and scratches. Cost: $20 to $60 per square foot.
- Granite. Natural granite counters were one of the most durable types in tests at Consumer Reports, resisting heat, cuts, and scratches. They’re also popular for their looks, with each slab having a unique pattern. However, granite has to be sealed regularly to resist stains, and the corners can chip. Cost: $20 to $60 per square foot.
- Quartz. Quartz composite, also known as engineered stone, has the look and hardness of a natural stone slab, but it’s actually made from chips of quartz bonded together with acrylic or epoxy. Consumer Reports found it the most durable counter type of all, resisting scratches, stains, and heat damage. Its only problem is that sharp corners can chip. Cost: $20 to $60 per square foot.
- Other Stone. Many homeowners love the look of natural stone, such as soapstone, limestone, and marble. However, these stones are costlier than granite or quartz and not as durable. They all scratch and stain easily, and marble can also be damaged by heat. Cost: $20 to $75 per square foot.
As you can see, material has a big impact on total price. If you have 60 square feet of counter space, you could spend as little as $300 for a cheap laminate or as much as $4,500 for high-end stone. And if you want fancy details, such as a waterfall edge, that can add another $1,000 to the total.
However, if you have granite taste and a laminate budget, there are ways to get the look you want for less. For instance, instead of buying a solid slab of granite, you can get cheaper granite tile and install it over a base of plywood and tile backer board. Using a dark grout helps camouflage the grout lines so the granite looks like a single piece. If you do this yourself, it costs roughly the same as a professionally installed laminate countertop.
Another option is to mix materials. You can buy one slab of pricey granite or quartz and install it on an island, then go with a cheaper laminate in a complementary color for the rest of the counters.

New appliances usually account for around 15% of the cost of a kitchen remodel. Consumer Reports says a full suite of new appliances from mass-market brands will run you about $5,000. Pricey professional-style appliances from brands like Viking and Wolf can triple or even quadruple that cost.
Here are some ways to keep the cost down:
- Don’t Replace Everything. First of all, consider whether you can work with your old appliances. If they’re still in good shape, there’s no point in tossing them. If you need to replace just one appliance – say, the dishwasher – and you’re concerned that the fridge and range won’t match, consider painting them. You can get special appliance paint in a variety of colors, including stainless steel. Another trendy option is to paint your fridge with chalkboard paint so it can be used as a message center.
- Consider Buying a Set. If you do need to replace all your appliances, you can sometimes save money by buying them as a set. However, if top performance is your goal, you’re better off mixing and matching brands to get the best models. If you decide to go for a set, experts recommend choosing the one with the best range. Flaws in a fridge or microwave are easier to live with than an oven that doesn’t cook evenly.
- Pay for Quality, Not Style. When it comes to appliances, you don’t always get what you pay for. Tests at Consumer Reports show that pricey, pro-style appliances don’t perform as well as the top-rated models from mass-market brands. Moreover, there’s no evidence that they increase the resale value of your home any more than other new appliances. To get the best performance, rely on reviews from independent sources, rather than brand names.
- Choose a One-Piece Range. A range costs a lot less than a separate stove and wall oven. One of the top-rated electric ranges in Consumer Reports’ tests costs only $650, while a comparable stove and wall oven from the same brand cost $1,650 put together. Plus, wall ovens generally don’t perform as well as the ovens in a one-piece range.
- Check the Scratch and Dent Section. Stores that sell appliances, such as Home Depot, Lowe’s, Sears, and Best Buy, usually have a “scratch and dent” section for appliances that are damaged in some way. These units go for as much as 50% or 60% off their original sale price, and the flaws are often so tiny you’d barely notice them. Sometimes you can pay half price because of a scratch that won’t even be visible once the appliance is installed.
- Check the Energy Guide Label. The cost of an appliance isn’t just a matter of what’s on the price tag. You also have to consider the long-term cost of using the appliance year after year. Energy-efficient appliances, such as Energy Star models, can cost a little more up front, but they’ll often pay for themselves in long-term savings. Check the yellow “Energy Guide” label on the front to see at a glance how much an appliance should cost you to run each year. Then multiply that by 10 and add it to the price tag to figure out how much the appliance will cost you over 10 years of ownership. That’s the number you need to compare to figure out which appliance is the best value.
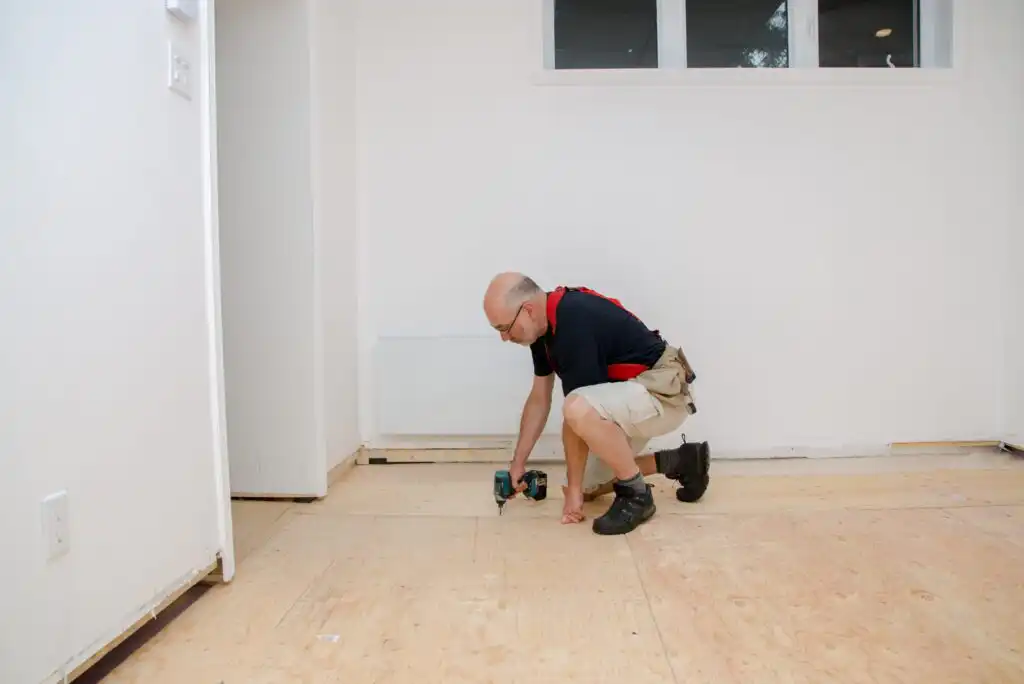
According to HomeAdvisor, new flooring for a mid-range kitchen typically costs $1,800 to $2,800. Here, again, the price varies depending on the material you use. Sheet vinyl can cost as little as $1,000, while hardwood – a popular choice for modern kitchens – costs around $4,000.
If your budget won’t stretch this far, here are a few cheaper flooring options to consider:
- Just Clean It. Sometimes, a good cleaning is all it takes to get old tile floors looking like new. If yours is so filthy that mopping it no longer has an impact, you can have it professionally cleaned for around $450.
- Look Underneath. If your kitchen has hideous old vinyl flooring, it could be worth peeling it up and having a look at what’s underneath. Sometimes, buried under the layers of cruddy vinyl, you can find perfectly good hardwood floors that only need to be refinished. That’s a job you can have done for around $600.
- Use Peel-and-Stick Tile. Peel-and-stick vinyl tiles are easier to work with than sheet vinyl, so installing them is a fairly easy DIY job. If your floors are reasonably undamaged, you can apply the new tiles directly over the old flooring. You can buy peel-and-stick tiles at home centers for around $1 a square foot.
- Paint the Floor. Believe it or not, it is possible to paint over old vinyl flooring. Clean the floor well, and scuff it lightly with sandpaper. Then roll on a coat of primer and paint it with tough “porch and floor” paint. Optionally, you can add a coat or two of water-based polyurethane to protect it. You can choose your own color and add patterns like stripes, checks, or stenciled designs. You can transform an entire floor this way for about $100.

One of the most popular ways to brighten up a kitchen is to add a fancy tile backsplash that covers one entire wall. This project can vary widely in cost, since there are all different kinds of tile to choose from, including colorful glass mosaic tile, plain white subway tile, and even stone. Home Advisor says the cost ranges from $592 for 20 square feet of ceramic tile to $1,240 for 40 square feet of stone.
However, you can cut this cost considerably if you do the job yourself. Consumer Reports estimates that you can DIY a new tile backsplash for around $3 to $5 per square foot. If you’re tiling over a bare wall, or replacing an old backsplash that was laid over drywall, this is a reasonably easy job. However, removing an old backsplash from a plaster wall is much harder, so you might need to call in a pro.
If you’re on a really tight budget, there are other backsplash options that are even cheaper, such as:
- Thermoplastic Panels. Made from molded plastic, these panels come in a wide range of colors and patterns. They can mimic the look of more expensive materials, such as wood, tin, or oiled bronze. You can cut them to size with scissors or tin snips and install them with caulk or double-sided tape, making this material a good choice for DIYers. Thermoplastic panels are moisture-proof, stain-proof, and easy to clean, but they’re vulnerable to heat, so you shouldn’t mount them behind a stove. Cost: $18 to $20 per 18.5-by-24.5-inch panel, or about $150 for a whole backsplash.
- Beadboard. You can buy pre-finished beadboard in the form of large panels made from plywood, medium-density fiberboard, or PVC. Like thermoplastic panels, this material is easy to cut to size and install yourself, and you can paint it any color you like. PVC panels are resistant to moisture, but both PVC and wooden beadboard can warp if exposed to high heat. Cost: $1 to $3 per square foot.
- Wallpaper. Vinyl wallpaper is splash-resistant, easy to clean, and available in a wide variety of colors and styles. You can even buy wallpaper that copies the look of other materials, such as tile, beadboard, or punched tin. Many wallpapers come in a peel-and-stick form that can be applied without wallpaper paste, making them much easier to install than real tile. However, like other choices, vinyl wallpaper is not heat-resistant, so you can’t use it behind a stove. Cost: Around $40 for a 30-square-foot roll.
- Paint. Finally, you can simply paint the wall behind the sink to design your own backsplash. This is probably the most versatile option of all, as you can create pretty much any design with paint. You can use a bright solid color, make stripes, use a stenciled pattern, or stencil on letters to spell out a favorite quotation. If you love the look of tile but not the cost, you can create a faux tiled wall by using tape to make “grout lines” and painting the squares in between. Chalkboard paint in a light or dark color is also a good option, as it’s easy to keep clean. Cost: About $10 to $20 per quart of paint.
Updating light fixtures in your kitchen is a twofer: The fixtures themselves look better, and the whole room looks better when it’s properly lit.
New lighting usually accounts for around 5% of kitchen remodeling costs – between $1,000 and $2,000, on average. Here are some tips to get the most bang for your buck:
- Don’t Go Too Bright. Too much light can be as bad as too little – especially if there’s no way to turn it down. Instead of lighting the whole room up like a showroom floor, target light to the places it’s needed most, such as the counters where food is prepared.
- Install Your Own Under-Cabinet Lights. Many modern kitchens include accent lighting under the cabinets. Rather than hiring an electrician to install some, buy lights that attach to the underside of the cabinet and plug right into your wall outlets. You can get these at home centers for around $20 each. Simpler still, you can get inexpensive battery-powered “puck lights” – around $30 for six lights – and stick them to the cabinet bottoms.
- Consider Outdoor Fixtures. For bargains on light fixtures, check the outdoor lighting section. You can find good-looking sconces and pendant lights here for $100 or less. These models are a particularly good fit for rustic- or industrial-style kitchens.
- Go Green. While you’re updating your lights, outfit them with some energy-saving LED bulbs. Prices for these have come way down in the past few years; you can now get a pack of eight 800-lumen bulbs for around $20. These are as bright as a 60-watt incandescent bulb, but use only 8.5 watts. Over the course of their lifespan, they’ll cost you much less in energy bills than old incandescents or even compact fluorescent (CFL) bulbs.
Final Word
Sometimes, no matter how you pinch your pennies, you just can’t afford a head-to-toe kitchen remodel that lives up to your dreams. In this case, consider remodeling your kitchen in stages, instead of doing everything at once. For instance, you might replace the flooring this year, get new counters next year, and add a backsplash and new lighting the year after that.
Doing a remodel in stages has several advantages. First, it gives you more time to save money for each stage of the project. Second, it lets you break up the work into manageable chunks, instead of having it take over your life for months. And finally, it gives you a chance to live with each small change and see how it functions, which helps you get a better idea of what you’d like to do next.
What’s your favorite tip for remodeling on a budget?
Editorial & Advertiser Disclosure: The editorial content on this website is not provided, commissioned, reviewed, approved, or otherwise endorsed by any advertiser. Opinions expressed are ours alone, not those of any advertiser. The offers that appear are from companies from which we may receive compensation. However, this compensation does not impact where and how these companies are mentioned on the site. We do not include all companies or all available offers in the marketplace.
Related: