It’s expensive to heat, cool, and power a home. According to a WalletHub analysis of early 2020 federal data, the average monthly household energy bill ranged from a high of $372 in Connecticut to a low of $199 in Washington, D.C. Energy costs can really impact household budgets, especially at the lower end of the income scale. But a home energy audit can lower your monthly bill.
A home energy audit isn’t as simple as adjusting your thermostat. But according to the United States Department of Energy (DOE), the changes you make as a result of an audit can reduce home energy costs by anywhere from 5% to 30%, resulting in potentially thousands of dollars in savings during your years living in the home.
You can do a DIY home energy audit or hire a professional to do it for you, but first, you have to decide which is right for you.
DIY Home Energy Audits vs. Professional Home Energy Audits
Unless you live in a new-construction home with airtight seals and the latest home energy-efficiency technology, you’re almost certainly losing money (and harming the environment) due to some combination of poor air sealing, inefficient mechanicals, subpar insulation, outdated lighting, and power-hungry appliances.
To determine just how much money you’re leaving on the table and what you can realistically do about it, you need to conduct a home energy audit. A DIY home energy audit carries little (if any) financial cost, though a thorough audit can take hours to complete.
The principal downside of a DIY home energy audit is thoroughness. Without professional training and diagnostic equipment, you’re unlikely to match the precision of a professional assessment. But you can potentially save yourself some serious cash by doing the audit yourself first.
Then, if your DIY audit uncovers a lot of potential problems, follow up with a professional assessment conducted by certified contractors at companies that specialize in various types of home inspections or with certified employees or contractors of utility companies and state environmental agencies.
Some utilities, government entities, and nonprofits offer assessments for free or at a reduced cost. For example, Mass Save, a consortium of utilities and clean energy providers in Massachusetts, provides no-cost assessments.
If possible, avoid assessments conducted by employees of companies that can directly profit from their results, such as HVAC (heating, ventilation, and air conditioning) and window companies. If you have no other option, you’ll be glad you familiarized yourself with your home’s deficiencies with a DIY audit before they arrived.
DIY Home Energy Audit Checklist & Procedures
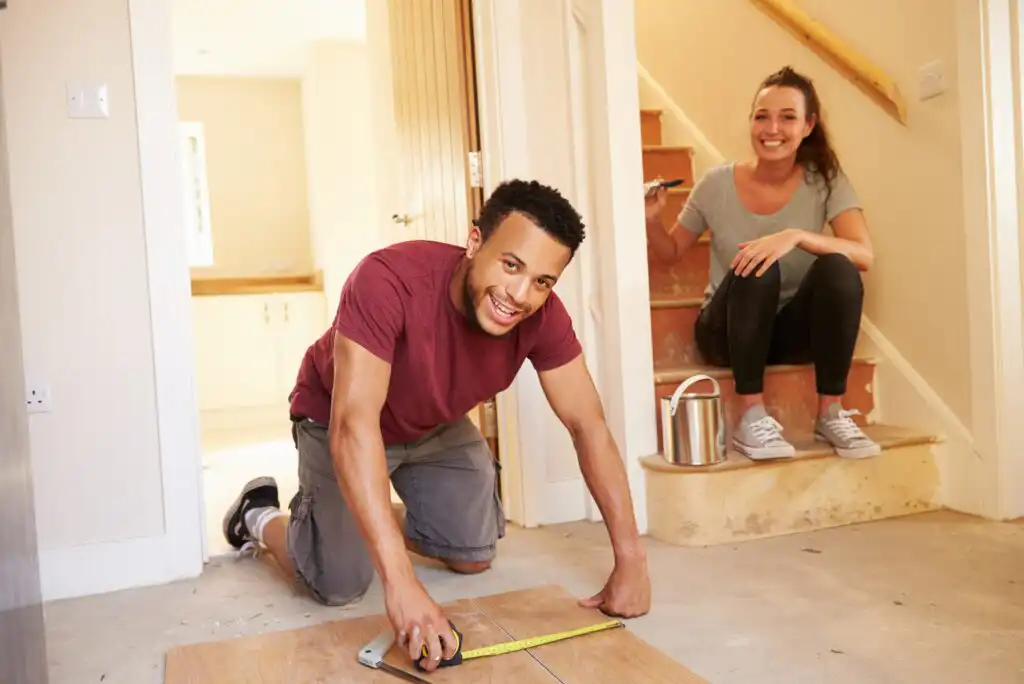
A do-it-yourself home energy audit requires some research and planning as well as a few hours. But it’s not a highly technical or dirty process and is well within the capabilities of most reasonably fit, financially motivated homeowners. With virtually no upfront cost, home energy audits are also more affordable than professional audits.
Before you begin your home energy audit, note any obvious problem areas, such as an old single-pane picture window or an ancient water heater. Add suspected issues, such as improper insulation in your walls or attic, to the list. Devote extra attention to these areas during your audit, and if you have time, research remedy or replacement costs and energy efficiency improvements.
1. Drafts & Air Leaks
Drafts can have a considerable impact on home heating and cooling costs, particularly in older homes.
Window and doorframes are the most significant sources of unwanted drafts. But vent hoods, bathroom vents, fireplaces, window-unit air conditioners, and climate-control ducts can invite outside air into the home too.
Smaller — but costly — drafts can occur in a host of other places, such as:
- Switch plates and electrical outlets
- Recessed light fixtures
- Electric and gas service ports
- Cable and phone line ports
- Dryer vents
- Mail slots
- Foundation cracks
- Water service lines
During your audit, visually inspect these elements for cracks or weak spots. On windy or cold days, you can probably identify the most problematic drafts simply by walking around the interior of your home and putting your hand (preferably dampened to enable you to sense subtle air movements more effectively) near suspected problem areas.
Alternatively, if you live in an area without lots of ambient night light, walk around the exterior of your darkened home while a partner shines a flashlight at each potential problem area from the inside. Every flash of light hints at a draft.
To get a clearer and more detailed picture of the extent of your home’s drafts, conduct a DIY building pressurization test after your initial visual audit.
On a cool, windy, day, turn off all your home’s mechanical appliances (including the furnace and air conditioner), and tightly close all windows and doors. Turn on all the fans that vent outside, including your kitchen and bathroom vents as well as appliances with external vents, such as your clothes dryer. Keep ceiling fans off, as they don’t vent outside and can obscure the sources of drafts.
Light an incense stick and hold it near every potential draft site. You can gauge the presence and severity of each draft by noting whether and by how much the stick’s smoke wavers. If there’s a meaningful draft, the smoke won’t rise in a straight, solid line; it’ll swirl with the air currents and dissipate before rising too far.
Note that some drafts are necessary. For instance, if you have a gas furnace, it’s probably served by an exterior vent that draws in air as the furnace burns. This air supply keeps the furnace operational and prevents it from sucking oxygen out of the home’s living spaces.
2. Insulation
Insulation (or lack thereof) can really affect your home’s energy appetite. Unfortunately, checking for proper insulation is a time-consuming and inexact process. During your DIY audit, look for insulation in the attic, walls, and basement or crawl space.
Attic
Check that your attic’s access door is insulated to the same degree as the attic floors and that its edges are properly weatherstripped or sealed. Verify that the insulation in your attic’s walls, floors, and ceilings is evenly spaced and that there’s enough insulation to cover any visible joists. If you’re not sure where to start, the Nebraska Public Power District produced a short video on how to inspect your attic insulation.
Next, review the DOE‘s R-value recommendations for your area to assess the insulation’s suitability. Home Depot provides a particularly easy-to-use chart. Match the R-value specified for your zone with that of the insulation material (such as fiberglass, mineral wool, or cellulose) in your attic.
For example, rolled fiberglass (batt) insulation has an R-value of approximately 3.1 to 3.4 per inch of thickness, meaning 10 inches of rolled fiberglass has a total R-value between 31 to 34. That makes it appropriate attic insulation for Zones 1 through 3. But its R-value isn’t high enough for Zones 4 through 7.
Wherever possible, look under your attic insulation for the presence of a vapor barrier, such as tar paper or plastic sheeting. Vapor barriers prevent moisture buildup, which can reduce the insulation’s effectiveness.
Walls
Short of knocking a hole in every wall of your house, it’s hard to get a precise picture of your home’s wall insulation. The best you can do on your own is to check the insulation behind the electrical sockets.
To do so safely, turn off the circuit breaker or fuse for each outlet you test. Confirm that no power is flowing by plugging in an electric device, and then remove the cover with a screwdriver. Gently poke a plastic stick, preferably with a hooked or bobbed end capable of catching loose material (such as a crochet hook), through the void. If you feel resistance or find bits of insulation on the withdrawn stick’s end, there’s at least some protection there.
Shining a flashlight through the void may give you a better sense of the degree to which that section of wall is insulated and help you identify the insulation material, which is essential for determining R-value.
Basement or Crawl Space
If your home has an unconditioned crawl space beneath its first floor that’s safe to enter, visually confirm that the underside of the first floor has an adequate, unbroken area of insulation.
If your home has an enclosed underground basement, confirm the basement’s above-ground perimeter (the top of the foundation wall, which is usually the same as or just behind the basement wall) has adequate insulation as well. This insulation should be below the basement ceiling along the exterior wall but above the ground line. It’s usually of the batt (pink or yellow fluff) or blown (dense yellow foam) varieties and may be easier to see around basement window wells.
In finished basements with living spaces and full climate control, wall insulation needs to be similar to wall insulation found above ground at an R-value appropriate to your area. Check finished basements like you checked the walls.
3. Combustion Appliances
Water heaters, furnaces, boilers, and water well pumps become less efficient as they age. This inevitable process slowly increases your utility bills — electricity, natural gas, home heating oil, or all three, depending on where you live and the type of equipment you have.
To determine the ages of your home’s combustion appliances, look up their brands and model numbers (or serial numbers if you can find them) on the manufacturers’ website.
Without a serial number, you can’t determine the exact age, but you can get close. For example, while I know the boiler model in an old house I own was manufactured between 1983 and 1987, I’m not sure of the exact month. I do know enough to know it’s very old and will likely need a replacement in the next few years.
You can expect combustion appliances to deteriorate on the following schedules, though some will die early and some, like my boiler, may exceed their life expectancies:
- Storage Water Heaters: 10 to 15 years
- Tankless Water Heaters: 20 to 30 years
- Oil and Gas Furnaces: 15 to 25 years
- Boilers: 20 to 30 years
The most cost-effective approach to combustion appliances nearing the end of their usable lives is to replace them with newer, more efficient models, as repairs offer diminishing returns with age.
If your combustion appliances are newer, look for soot buildup and burn marks around outflow vents. These suggest inadequate ventilation, which can be dangerous (and costly) if not addressed by a professional. Also look for dirt streaks near seams, which indicate air leakage, another efficiency issue.
Even in conditioned basement spaces, check all visible water piping (such as the pipes running from your water heater to your washing machine) for proper insulation. Piping may be insulated with removable sleeves (commonly fiberglass or neoprene) or pre-insulated (commonly with urethane foam attached to and completely encasing the pipe material). In either case, the insulation should have an R-value of at least 6, regardless of geographical location.
If you have a gas furnace and can safely access the filter, inspect it for dirt buildup and clean or replace it if it appears dirty or worn. When the equipment is running, listen for unusual sounds, such as knocking in the furnace or rattling in the water heater.
Lastly, look through service records (sometimes marked on the side of the equipment) to determine the last service date. If it has been more than five years, schedule an inspection with a local HVAC provider, preferably the company that installed the equipment, provided their rates are competitive.
4. Kitchen Appliances & Electronics
Take stock of your home’s appliances and electronic devices — everything that’s plugged into the home’s electrical system, gas line, or both:
- Home computers and laptops
- Home office equipment (printers, scanners, all-in-ones)
- Televisions, cable boxes, and streaming hubs
- Window air conditioners
- Laundry appliances (washers and dryers)
- Dishwashers
- Conventional ovens and stovetops (ranges)
- Microwave ovens
- Toaster ovens
- Refrigerators and freezers
- Small kitchen appliances (for example, coffee makers and toasters)
- Humidifiers and dehumidifiers
For each item, determine the exact make and model, and then cross-reference that information with Energy Star to determine its annual cost to operate and expected lifespan.
Later, you can use cost-to-operate information to research more efficient replacement appliances. But as with water heaters and boilers, it usually doesn’t make financial sense to replace an inefficient appliance until it approaches the end of its useful life.
As you take stock of your home’s appliances, note any that remain plugged in or operational when not in use. For instance, home computers and printers often stay powered up and plugged in around the clock, even if you only use them a few hours per week.
And obviously, refrigerators and freezers need to remain on 24/7. But many other appliances — such as washers, dryers, dishwashers, and garbage disposal systems — also usually remain plugged in for convenience.
Check the seals on all internally conditioned appliances, such as refrigerators and freezers, and make a note to replace any that appear to be faulty. Also, note appliances with eco or low-power modes. These are common on many energy-hungry devices, such as window air conditioners, dishwashers, and washing machines. Use them as your default.
5. Air Ducts
A thorough air duct inspection requires specialized equipment that most homeowners don’t have on hand and isn’t worth purchasing for a DIY home energy audit. However, the average homeowner can directly inspect forced-air ducts in human-accessible areas of the house, such as crawlspaces and unfinished basements, and indirectly gauge the efficiency and performance of the entire system.
- Direct Duct Inspection Using a Smoke Test. Turn on your system’s blower (or just turn on the heat or AC) and find an easily accessible length of ductwork, perhaps on your unfinished basement’s ceiling or in your attic or crawlspace. Then, perform the same smoke test you used to check for outside air leaks. Hold a lit incense stick (or piece of single-ply toilet paper if you prefer) to each visible duct joint or connection to determine whether and how badly they’re leaking. Mark each leak with a small piece of tape or permanent marker to help you remember their location when the time comes to fix them.
- Assessing System Efficiency and Performance. Keeping your blower running, turn off all other fans in the house (such as bathroom fans) and completely close all exterior windows and doors but one. Open that portal no more than 2 inches, and put your hand directly in front of the opening. If you can feel a rush of air coming in, that’s a sign your home’s interior has depressurized slightly due to leaks in the forced-air duct system. If the system were well-sealed, you’d feel some air come in, but not a noticeable rush.
For more information, the International Association of Certified Home Inspectors has a comprehensive video overview of DIY duct inspection.
6. Lighting
Lighting isn’t rocket science. Older incandescent and fluorescent bulbs are less efficient than compact fluorescent light bulbs (CFLs) and light-emitting diode bulbs (LEDs).
To assess your home’s lighting efficiency, walk through your house and note the bulb type in every light fixture. Repeat this process with your exterior lights and floodlights.
Take stock of motion sensors, wall dimmers, and lighting timers, all of which can reduce your total lighting costs. Note where it would be appropriate to install these items — for instance, dimmers are common in family rooms, while motion sensors are useful in basements and outdoor areas.
Getting a Professional Home Energy Assessment
If your DIY home audit reveals lots of potential problem areas or you’re willing to pay a professional to do a more thorough and precise job than you can manage on your own, spring for a professional home energy assessment.
Finding & Paying for Your Professional Auditor
To find an assessor, look to a reputable trade organization, such as the Residential Energy Services Network (RESNET) or Building Performance Institute. Both organizations have extensive lists of affiliated auditors, which are also known as assessors. Alternatively, call or visit your electric utility’s website and look for information about recommended assessors in your area.
Avoid assessors supplied by companies that profit from their own recommendations — for example, window installers.
Confirm your chosen auditor can provide a detailed written report following the inspection. The information should be easy for laypeople to understand. For instance, RESNET assessors score each home’s energy efficiency on RESNET’s proprietary HERS Index scale, which assigns lower numbers to more efficient homes.
Some utilities offer free or reduced-cost assessments through their favored auditors. Some state governments have similar programs, so check with your jurisdiction’s environmental authorities before proceeding. Just search for your state’s name plus “environmental agency” if you don’t know what it’s called. Then look for an “energy audits” tab or similar.
If you don’t get a break on your assessment, expect to pay as little as $200 to as much as $700, per HomeAdvisor. Audits at the lower end of the range are less thorough and primarily visual — similar to a DIY audit but conducted by a professional who knows what to look for. Costlier assessments are diagnostic, meaning they use precision tools to quantify waste and inefficiency.
Preparing for Your Assessment
Prepare for your assessment by compiling a list of basic information about your family, house, and energy use. Your auditor is likely to ask for the following:
- Utility bills going back at least one year
- House dimensions and construction
- Number of people living in the house
- Room use patterns, including the existence of seldom-used or unused rooms
- Residents’ routines, including whether anyone is at home during working hours
- Thermostat type (standard, programmable, or learning) and settings
- List of known or suspected problem areas
- The results of your DIY audit, if applicable
Schedule the assessment at a time when it’s convenient for you or a trusted family member to be home. Plan to accompany your assessor during the visit unless explicitly told not to. Most assessors are happy to answer questions and explain what they’re doing as they go.
What a Professional Assessment Entails
Professional energy assessments resemble DIY audits in many ways. Though your assessment will vary based on your home’s size, layout, and energy profile, it’s likely to involve inspection of:
- Exterior Leaks. The auditor walks around the outside of the house and visually inspects for drafts and air leaks around common leak points, such as the foundation, walls, exterior fixtures, and windows.
- Interior Leaks. In a visual assessment, the auditor basically repeats the draft-finding portion of the DIY audit from the inside of the house. During a more thorough assessment, the auditor often conducts a blower door test, which uses a high-powered fan to depressurize the house’s interior and force exterior air through draft points, providing a whole-house picture of heat loss due to leakage. During the blower door test, the auditor precisely measures leaks using tools such as infrared cameras that can pinpoint leak-related temperature changes, manometers that measure leak-related pressure changes, and smoke generators that identify leaks using thin smoke streams (similar to the DIY incense stick approach).
- Insulation. The assessor visually inspects insulation in all human-accessible areas of the house and may replicate the power outlet probe test as well. In a more thorough assessment, the assessor uses a moisture meter to detect efficiency-sapping moisture buildup in the attic and basement along with thermal imaging equipment to detect thin or nonexistent insulation in living-floor walls.
- Combustion Appliances. Home energy auditors devote special attention to appliances connected to natural gas lines or oil supplies, including furnaces, boilers, gas water heaters, gas dryers, and ranges. This inspection always involves a thorough visual scrutiny and filter check, if applicable. Most auditors use combustion analyzers, which measure the composition and temperature of vented gases, to detect potential inefficiencies (and immediate dangers, such as carbon monoxide leaks). They also commonly use internal and external temperature probes, which measure combustion appliances’ working temperatures relative to optimal performance.
- Ducts. Auditors inspect ductwork in all human-accessible areas of the house, checking for tight seals and proper insulation. In areas that aren’t easily accessible, they rely on thermal imagers to see through walls and ceilings.
- Noncombustion (Kitchen) Appliances. Assessors inspect every major noncombustion appliance for potential energy waste. That involves a visual inspection to ascertain appliance age and construction as well as appliance-specific assessments of things like refrigerator door seals and freezer settings. Some assessors use watt meters to measure appliances’ actual electrical draw compared to the models’ optimal baselines.
- Lighting. Assessors take stock of every light fixture and bulb in the house. Often, they simply recommend swapping out incandescents for more efficient bulbs, such as LEDs and CFLs.
It’s common for professional assessors to take a lot of notes and photos throughout the process. At least some of the photos your assessor takes are likely to make it into the final report, creating a helpful before snapshot of your home’s efficiency shortcomings.
What to Do After Your Home Energy-Efficiency Audit
If your audit uncovers a boatload of inefficiencies, you’ll face a laundry list of fixes and energy efficiency upgrades, many of which won’t come cheap.
If you’re having a professional audit, determine how much you can afford to spend on these fixes and upgrades before you know what’s necessary. That way, you don’t upend your household’s finances by simply saying yes to the whole lot. Some fixes and upgrades may require professional help, which can further add to the cost.
That said, you may be unwilling or unable to pay a contractor (or multiple contractors) to fix expensive efficiency or performance issues. If that’s the case, determine how much time you’re willing and able to devote to the fixes yourself.
If you’re short on time, start by addressing only the quickest, easiest issues, and set more ambitious fixes aside for the professionals.
But note it could take a while to see a return on investment for some energy-efficiency fixes based on current and future utility rates and the amount by which a fix reduces consumption. Some time frames are quite short — for example, inexpensive window weatherstripping can pay for itself in a year or less by taking a few dollars per month off your electric bill. Other updates’ payoff periods stretch to a decade or longer.
If you’re planning to move in the short- to medium-term, some fixes are unlikely to pay for themselves, at least in terms of direct utility savings.
On the other hand, some energy-efficient upgrades actually boost appraisal value, potentially paying for themselves (in some cases, multiple times over) when it comes time to sell. For example, energy-efficient windows and doors and combustion appliances (mechanical systems like furnaces and water heaters) all tend to raise a home’s value.
If you’re planning to sell your home soon, factor the potential to list your newly efficient home at a higher price into your cost-benefit analysis. With sufficient equity in your home (at least 20%, in most cases, and ideally more), you can even use a home improvement loan or general-purpose home equity loan to quickly finance the cost of major repairs, then pay it off when you sell.
If you plan to stay in your home for a while, a home equity loan could still make sense, but weigh your loan’s total expected cost against the upgrades’ predicted energy savings over time.
For more details on what to do after your DIY or professional home energy-efficiency audit, read our guide to acting on your audit’s findings.
Final Word
For the average homeowner or utility-paying renter, the most compelling reason to conduct a home energy efficiency audit or assessment is to identify actionable ways to reduce electricity and climate control costs.
But that’s not the only reason to put your home’s energy consumption (and waste) under the microscope. A thorough audit or assessment can be an illuminating experience that reveals just how inefficient modern life can be and underscores the price many of us pay to enjoy the conveniences of living in the second decade of the 21st century.
Fortunately, it’s also liable to reveal just how empowered we are to make small but meaningful changes that add up to big savings — and potentially a significant weight off our fragile planet’s shoulders.
Editorial & Advertiser Disclosure: The editorial content on this website is not provided, commissioned, reviewed, approved, or otherwise endorsed by any advertiser. Opinions expressed are ours alone, not those of any advertiser. The offers that appear are from companies from which we may receive compensation. However, this compensation does not impact where and how these companies are mentioned on the site. We do not include all companies or all available offers in the marketplace.
Related: