My husband and I are avid composters. All our kitchen and yard waste goes into a bin we built ourselves, and we pull out enough finished compost each year to feed about half our vegetable garden. When my husband tells friends and co-workers about our setup, they often respond with a sigh, “Gee, I wish I could do that.”
If he asks them why they can’t, some of them explain they just don’t have the time to build and maintain a compost pile. Others say their yard isn’t big enough or they don’t have a yard at all. And occasionally, some add that setting up a compost bin is too expensive for the small amount of vegetable waste they have.
What they don’t realize is that none of these problems is really a deal breaker. Composting is an incredibly versatile process, and it doesn’t have to take a lot of time, space, or money. No matter which of those resources you’re short on, there’s a composting method out there that can work for you.
Any kind of vegetable matter, left to its own devices, will eventually decay. Composting is simply a way of controlling that natural process. When you gather a heap of plant waste together in one place, it breaks down into a dark, crumbly substance called humus that makes a nutrient-rich fertilizer for home gardens or other landscaping projects.
Benefits of Composting
It’s easy to understand why my husband’s co-workers say they would love to compost. It offers a whole list of benefits — for your yard, your wallet, and the Earth.
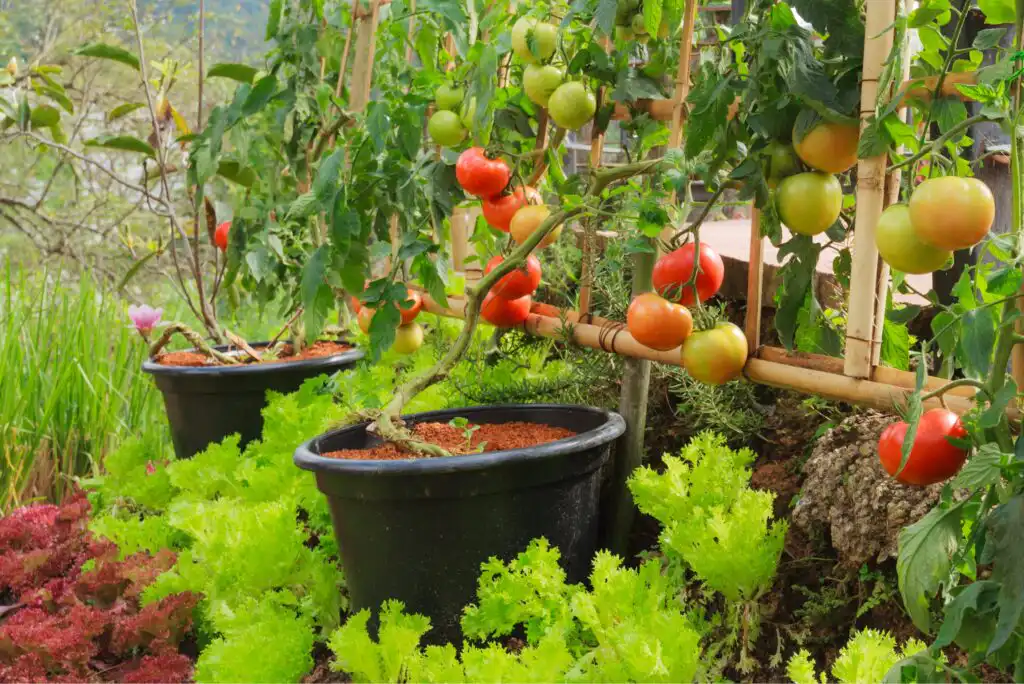
- Free Fertilizer. Compost improves the texture of your garden soil, allowing it to hold both water and air better. It also adds nutrients and promotes healthy root development in garden plants. And with home compost, you get all these benefits for free. This year, our home compost bin produced about 50 gallons of finished compost, which would have cost us about $35 to buy in bags at a garden center.
- No Harmful Chemicals. Commercial compost often contains lingering traces of herbicides, so using it in your garden can kill your plants instead of nourishing them. This problem is known as “killer compost.” When you make your own compost, you can keep it free of dangerous chemicals.
- Less Waste. According to the Environmental Protection Agency (EPA), food scraps and yard waste make up around 28% of your household trash. If your town charges you by the bag for household trash pickup, putting that waste in the compost bin instead of out by the curb shaves up to 28% off your annual bill.
- Healthier Soil. Adding compost to your garden soil improves its health in ways commercial fertilizers can’t. According to the EPA, soil enriched with compost retains moisture better and is less prone to pests and diseases that can harm your plants.
- A Cleaner Planet. Composting is an eco-friendly activity in more ways than one. When vegetable matter breaks down in a landfill, it produces methane, a potent greenhouse gas. In a compost pile, decaying waste produces far less methane, so composting is a way to fight global warming. On top of that, using finished compost for gardening reduces the need for chemical fertilizers, which can pollute the water supply and kill fish.
If composting has so many great benefits, why doesn’t everyone do it? Judging by my husband’s co-workers, it’s because most people think maintaining a home compost bin requires too many resources, including:
- Effort. It’s a bit more work to sort food and garden waste into a separate pile than simply to throw everything in the trash. However, depending on the composting method you choose, you may not have to do much more than that. It’s possible to put significant time and effort into building and maintaining a compost pile that will break down your waste in record time, but it’s not truly necessary.
- Time. You can’t turn waste into usable compost overnight. With the simplest, lowest-effort type of compost pile, it can take a year or more to go from potato peels to rich, dark humus. However, if you’re willing to put in more work, such as layering your waste in the pile, keeping it moist, and turning it regularly, you can cut this down to a few months or even a few weeks.
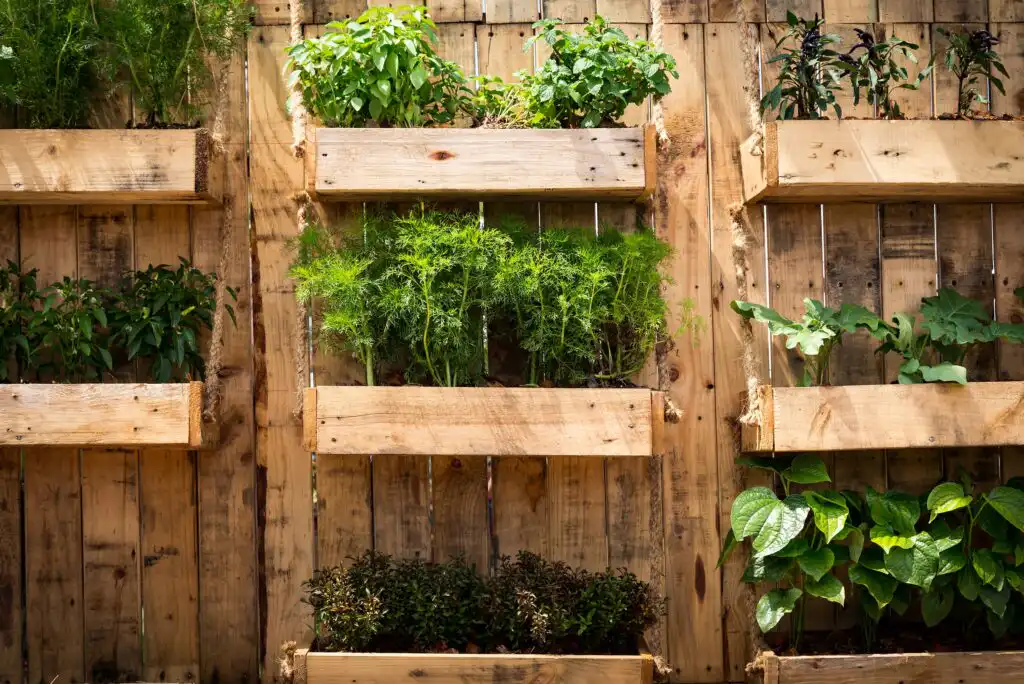
- Space. According to the Cornell Waste Management Institute, a compost pile needs to be at least 3 feet on each side — length, width, and height — to build up enough heat to kill germs and speed the breakdown of waste. However, a pile isn’t the only way to make compost. Some composting methods require no more outdoor space than a 5-gallon container. You can even compost indoors with a worm bin (called vermicomposting — more on that below) that fits inside a kitchen cabinet or an electric digester that sits on the counter.
- Money. Garden supply centers sell all kinds of expensive composting equipment and supplies, from rotating bins to compost accelerators. However, you don’t need any of that to make compost at home. My husband built our current compost bin from free shipping pallets and just a couple of dollars’ worth of hardware.
Just about any kind of vegetable waste can go into a compost pile. In addition to actual plants and plant parts, you can compost materials made from plants, such as paper, clean sawdust, and even dryer lint, as long as it comes from clothes made of natural fibers. The best compost is 2 to 3 parts “brown materials” and 1 part “green materials.”
Brown Materials
Brown materials are dry and rich in carbon. Examples include:
- Paper Products. You can compost office paper, newspaper, cardboard, and toilet paper rolls. It’s best to shred these materials before adding them to the bin so they break down faster and don’t get matted. The compost guide from Eartheasy, a natural products store, warns that you should not compost glossy paper or paper with colored ink.
- Dry Yard Waste. Dry yard waste includes dry leaves, pine needles, straw, and small twigs. Hay, which contains seeds, is also compostable, but it isn’t ideal because of the risk of seeds sprouting in the compost. Small branches and twigs can go in, but they take a long time to break down. Don’t use large amounts of pine needles, which are highly acidic, and don’t compost leaves or twigs from black walnut trees.
- Woody Waste. Wood chips, clean sawdust, and even ashes from clean materials can all go into compost. However, these materials are all very high in carbon, so use them sparingly.
Green Materials
Green materials are moist and add nitrogen to the finished compost. Examples include:
- Kitchen Scraps. Fruit and vegetable peels, coffee grounds, tea bags (with the staples removed), nutshells, and crushed eggshells can all go in compost. However, meat, bones, and fish scraps should not because they can attract pests to the compost pile. You should also avoid adding dairy products and greasy or oily foods to the compost. Peels from oranges, peaches, or bananas can have pesticide residue, but this should not be a problem with organic fruits.
- Moist Yard Waste. You can compost green leaves, stems, flowers, and grass clippings as long as the grass is herbicide-free. Weeds can go in the compost bin only if they have not gone to seed. If they have, the seeds sprout in whatever garden bed you spread your compost on. Also, do not put any diseased plants into the compost pile.
- Some Animal Wastes. Manure from chickens, cows, horses, and rabbits is safe to compost. In fact, animal droppings can be an excellent compost activator. Adding them to the pile makes the rest of the waste break down faster. However, do not add pet manure if you plan to use the finished compost on food crops. It could spread disease.
Most online composting guides will tell you the best way to make compost is in a large, carefully constructed pile: at least 3 feet on each side, with green and brown materials added in layers. They’ll also say that to make compost break down faster, you must cover it to hold in heat, add enough water to keep it moist, and turn the material over with a pitchfork regularly to add air — ideally, every time you add anything to the pile.
All this sounds like an awful lot of work, which is probably why my husband’s co-workers think they can’t do it. They assume it’s impossible to make your own compost without a lot of space for the pile and a lot of time to maintain it.
However, even if an actively managed pile is the best way to make compost, it’s far from the only way. There are countless methods for making compost: open piles and enclosed bins, large piles and small ones, regular turning and passive “cold” composting. Some methods are faster than others, but given enough time, all can yield rich, nourishing compost.
Less Work: Cold Composting
The main point of the elaborate instructions most guides provide for making compost — making a large pile, layering greens and browns, turning the pile regularly — is to keep the pile warm. Getting its center to a temperature between 140 and 155 degrees F kills weed seeds and pathogens, and keeping it warm keeps the compost “cooking” so it breaks down as fast as possible. Using this “hot composting” method produces finished, usable compost in anywhere from a few weeks to a few months.
However, if you’re willing to wait a year or two for your finished compost, you can cut out most of the work with the cold composting method. It’s the system my husband and I use in our yard, and it couldn’t be any simpler. Just put all your vegetable waste in the compost bin and leave it there. You can speed it along by turning the pile once in a while, but even if you don’t bother, the waste still breaks down eventually. We had our bin about a year before we pulled any usable compost out of it, but the finished product was just as dark and rich as anything we could have bought in a bag.
For those who are both lazy and impatient, it’s possible to speed up the cold composting process. When you first build your compost pile, be sure to include plenty of coarse material, such as straw, hay, weeds, or even crumpled sheets of newspaper. Spreading these materials evenly throughout the pile traps tiny pockets of air in the compost, so it stays aerated without having to be turned by hand.
Less Space: Enclosed Bins
A compost pile doesn’t have to take up a lot of space. If you have a small yard, you can keep your pile neatly contained in an enclosed bin.
Garden retailers offer a variety of ready-made compost bins:
- Open-Top Bins. An open compost bin is basically just a box for keeping plant matter contained while it breaks down. Material options include wire mesh, wood slats, or sturdy plastic with some openings in the sides to let air in. Open-top bins from Gardeners’ Supply Company cost anywhere from $40 for a simple mesh bin to $200 for a large bin with a hinged lid. If you keep your compost in this kind of bin, you have to open one side from time to time to turn the pile.
- Closed-Top Bins. Fully enclosed bins, also known as compost digesters, come in a wide variety of designs, from simple cone shapes to complex, multi-chamber composters, ranging in price from $80 to $300. They are usually plastic with a top lid you can open to drop in waste and some sort of door at the bottom for removing finished compost. An enclosed compost bin keeps out unwanted animals, but it also keeps out rain, so you have to add water to keep the pile moist. You can’t turn compost in an enclosed bin, so it takes longer to break down. But it’s also less work.
- Compost Tumblers. A compost tumbler is a metal or plastic barrel mounted on a frame so it can rotate freely. You open a hinged door to insert waste, then close it and rotate the barrel to turn the pile. This design keeps out rain and animals while still breaking waste down at a reasonable rate, but you can’t add more material to the tumbler once it’s full. Tumblers are the most expensive type of compost bin, with prices ranging from around $100 for a simple plastic drum to $370 for a dual-chamber model made from stainless steel.
No Yard: Vermicomposting & Electric Food Digesters
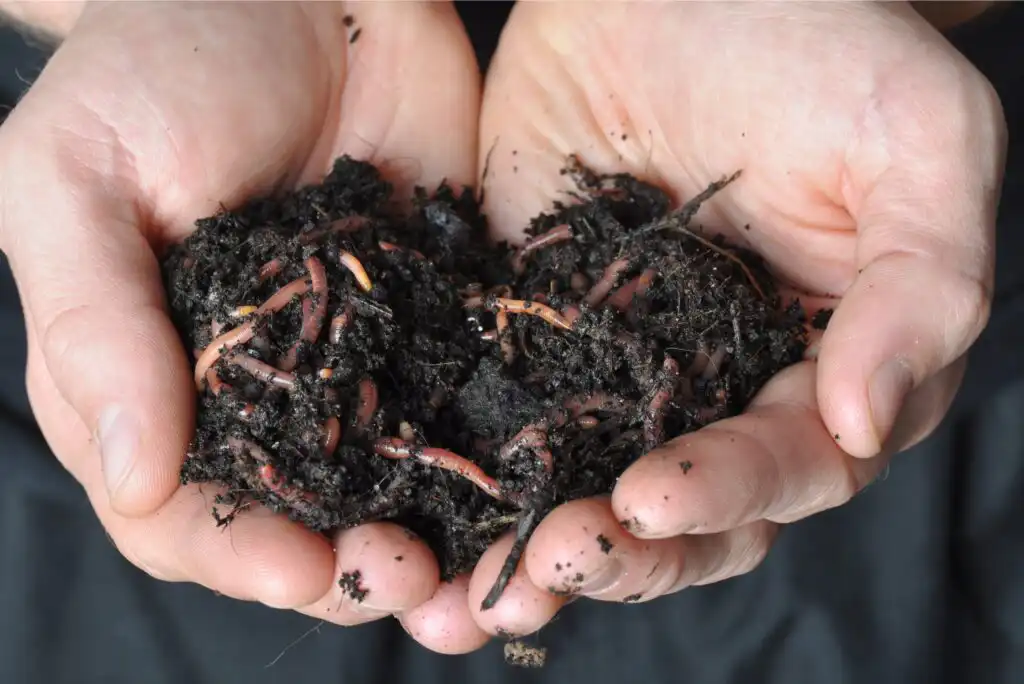
Even if you have no yard at all, you can still compost your kitchen scraps with a vermicomposting system. With this method, you put your vegetable waste into an enclosed bin filled with worms, typically red wigglers. The worms digest the waste and turn it into worm castings (excrement), also known as vermicompost, a rich brown material that makes excellent fertilizer.
A vermicomposting setup has just four parts:
- Worm Bin. You must keep the worms in an enclosed bin, 5 to 8 inches deep, made of an opaque material to keep out light. It should have a lid and side holes for ventilation. You can buy a ready-made bin, build one out of wood, or convert a plastic storage bin. The EPA has instructions for a simple DIY setup made from two plastic bins. Keep the bin indoors or in a spot at comfortable temperatures — between 40 and 80 degrees F.
- Worm Bedding. You can use any combination of dry leaves, shredded paper or cardboard, straw, hay, wood chips, peat moss, coconut fiber (coir), or finished compost. Before adding the bedding to the bin, soak it in water and then wring it out so it’s about as moist as a damp sponge, and fluff it up as you place it in the bin. Fill it about three inches deep, then mix in a handful of plain dirt.
- Worms. Common garden worms don’t work for vermicomposting — you need red wigglers. You can buy these at a bait shop, from a garden supply catalog, or online. To deal with a typical household’s kitchen waste, you need about 1 pound of red wigglers, which costs about $50. You can also buy an entire vermicomposting setup, complete with worms, for a little over $150. These ready-made kits have multiple stacking trays, making it easier to remove the finished compost.
- Vegetable Matter. The last step is to feed the worms. They can eat nearly any kind of vegetable waste, including vegetable scraps, most fruit scraps and peels, coffee grounds, tea bags, and moistened bread, but they cannot eat meat, fish, dairy products, bones, or greasy foods. It’s also best to avoid smelly foods like onions, which can make the bin smell bad, and go easy on citrus fruits and peels, which the worms have trouble digesting. Each time you add food, bury it beneath the top layer of bedding and add a handful of additional bedding.
A worm compost bin takes three to six months to produce finished compost. To harvest it, you can dump the bin onto a plastic sheet, remove the worm castings, and then reassemble the bin with fresh bedding before returning the worms to it. However, an easier way is to add food to only one side of the bin for a few weeks so all the worms move to that side. You can then safely scoop the compost out of the other side, add fresh bedding, and start feeding the worms on that side.
For apartment dwellers who find vermicomposting too much of a hassle, electric food digesters like the Food Cycler are a simpler alternative. These devices measure about 1 foot on each side and use electricity to break down food scraps quickly. They can turn anything from chicken bones to avocado pits into dry, nutrient-rich fertilizer in just a few hours. The only downside is the cost — typically between $300 and $700.
Less Expense: DIY Composting
You don’t need to shell out hundreds of dollars for a fancy system to make your own compost. Ready-made bins and tumblers can certainly make the process easier. However, if you’re short on cash, you can put together a simple home system for very little money.
The simplest setup of all is an open compost pile. All you need is a corner of your yard where you can pile up all your vegetable waste and let it rot.
However, an open pile takes up a fair amount of room, especially if you want to turn it with a pitchfork so it breaks down faster. It also needs to be in a spot that’s well out of the way since an open compost pile isn’t attractive and doesn’t always smell fantastic. And while an open pile works fine for garden waste, it’s not ideal for composting food scraps, which can attract rodents.
If you want to keep your compost a bit more contained, you can build a basic DIY compost bin. There are lots of tutorials online for making compost bins from different materials, such as:
- Wire Fencing. One of the simplest DIY bins is a cylinder of heavy-gauge wire fencing enclosing your compost bin. You can find instructions for this type of bin at The Spruce. A 3-foot-tall roll of wire fencing costs around $50.
- Lumber. Using a design from Vegetable Gardening with Loraine, you can build an open compost bin roughly 28 inches on each side from eight 6-foot fence boards, one 10-foot two-by-four, and a box of screws. The blogger who created it says she only spent about $50 on the materials.
- Pallets. Another effective, inexpensive material for a compost bin is shipping pallets, which you can often pick up for free from large stores that don’t want to pay to dispose of them. A simple plan from Bob Vila shows how to build a bin from four pallets, half a dozen L-brackets, and a pair of metal hinges. Your only cost for this would be about $10 for the hardware.
- A Trash Can. The cheapest way to make a fully enclosed, rodent-proof compost bin is to start with a large, heavy-duty, cylindrical garbage can, which you can buy for about $10. Drill holes around the sides for aeration, as shown on Better Homes and Gardens. When the lid is securely in place, you can turn the can on its side and roll it back and forth on the ground to tumble your compost.
The composting process doesn’t always run smoothly. Bins are prone to a variety of problems, including pests, odors, clumping, and dampness. Fortunately, most of these problems have a simple fix.
- Pests. Fruit and vegetable scraps can attract small flying insects, such as fruit flies. To discourage them, keep a pile of grass clippings near the bin and use them to cover exposed food scraps. To deter larger animals, such as raccoons, the best solution is an enclosed compost bin.
- Odors. Many people hesitate to start a compost pile for fear it will smell bad. However, as long as you avoid putting meat or bones into the compost and keep food scraps buried, odors aren’t usually a problem. If your pile smells like ammonia, it probably contains too much green material, so you should add more coarse brown materials, such as leaves, paper, or sawdust. A smell like rotten eggs is usually due to too much moisture or too little air — to fix it, add some coarse brown material, and give the pile a turn.
- Clumping. Wet materials, such as leaves, can stick together in a compost bin and form mats that keep the pile from breaking down evenly. Add these materials in small batches or use a pitchfork to break them up and mix them in thoroughly.
- Dampness. In the wintertime, an exposed compost pile can become waterlogged, leaving you with a soggy, unusable mess in spring. To avoid this problem, keep the compost pile covered, particularly in wet weather. However, if your pile is already soaked, all is not lost. You can correct the problem by turning the pile and adding lots of fine brown material that breaks down quickly, such as shredded leaves, peat moss, or straw.
- Slow Decay. If your pile seems to be taking forever to produce any usable compost, there are several possible causes. If the pile is too small, add more material. If it’s too compressed, turn it. If it’s too dry, add water. Keeping the pile covered and insulated in cold weather also speeds up the decay process. If none of that works, your pile is probably lacking in nitrogen, so adding more green material — grass clippings, food scraps, or animal manure — should do the trick.
There’s really no right or wrong way to compost at home. It’s all a question of which method works best with the resources you have available.
If you have plenty of space and time, you can get fast results with hot composting — layering green and brown waste in a large pile, keeping it moist, and turning it regularly. If you want a method with minimal effort, you can use cold composting, tossing everything in the bin and letting it break down on its own. If you’re short on cash, you can build your own bin from cheap materials. And if you’re short on space, you can invest in a worm bin or a countertop digester to dispose of your food scraps.
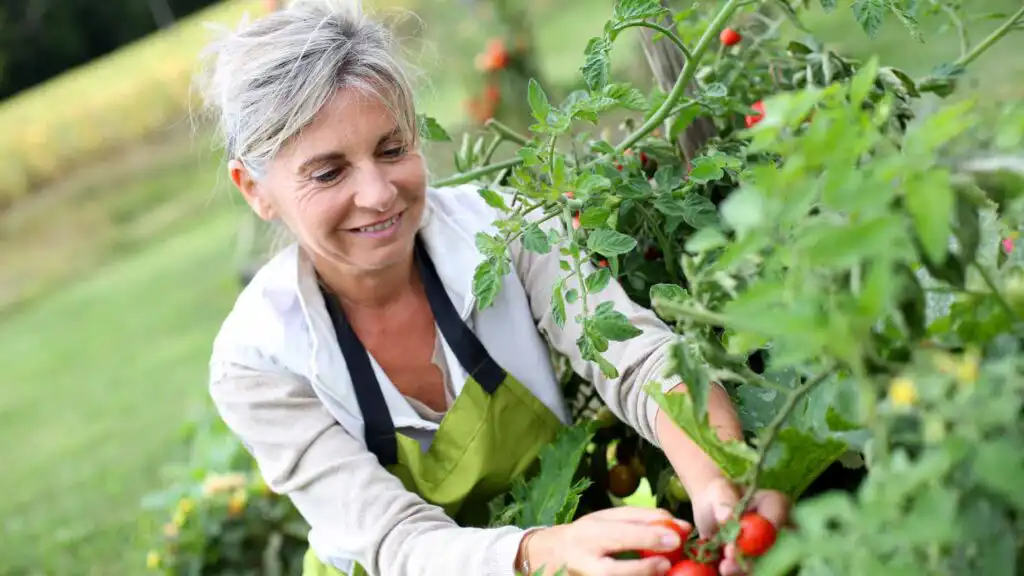
No matter what method you choose, you’ll eventually end up with nutritious finished compost for all the plants in your home garden or landscaping. My husband and I use ours in the vegetable garden, but we also like to mix it into the soil whenever we’re planting anything new. Over the years, we’ve used it on six creeping phlox plants, three plum trees, five bush cherries, 10 raspberry canes, and a dozen flowering perennials — all of which are still thriving. I can’t give the compost full credit for that, but it certainly didn’t hurt.
Have you ever thought about composting at home? What barriers are stopping you from trying it?
Editorial & Advertiser Disclosure: The editorial content on this website is not provided, commissioned, reviewed, approved, or otherwise endorsed by any advertiser. Opinions expressed are ours alone, not those of any advertiser. The offers that appear are from companies from which we may receive compensation. However, this compensation does not impact where and how these companies are mentioned on the site. We do not include all companies or all available offers in the marketplace.
Related: